The Microprocessor

The Derby Timer uses the ATMega168 microprocessorThis processor was included in the NerdKits package that I purchased online at http://www.nerdkits.com.  The NerdKits package includes the processor, a breadboard, USB cable, LCD display, and some miscellaneous parts.  Most importantly, the NerdKits package includes a .pdf manual that explained how to put the microprocessor together.  Since the Derby Timer was my first microprocessor project, the NerdKits manual was an invaluable help.  It was definitely money well spent.

The basic NerdKits package is meant for educational use, not an assembled project.  (It would be a bad idea to have a breadboard with jumpers banging around the derby timer!)  Since I now had practice programming the ATMega168 included in the NerdKits, I then purchased a printed circuit board kit from ProtoStack at http://www.protostack.com/boards/microcontroller-boards/atmega168a-development-kit, that uses the same processor technology.

Although the NerdKits and ProtoStack kits use the same microprocessor technology, there is an important difference in how they are programmed.  The NerdKits processor comes with a bootloader program pre-installed, while the ProtoStack processor does not.  The pre-installed bootloader allows the NerdKits processor to be programmed with the USB cable that comes included with the kit.  The ProtoStack processor requires a separate programmer.  There are some pros and cons to each method that I will cover in another post.  (Since I had not yet purchased a programmer, I was able to use the ATMega168 supplied with the NerdKits in the ProtoStack board and program it successfully using the NerdKits supplied USB cable.)

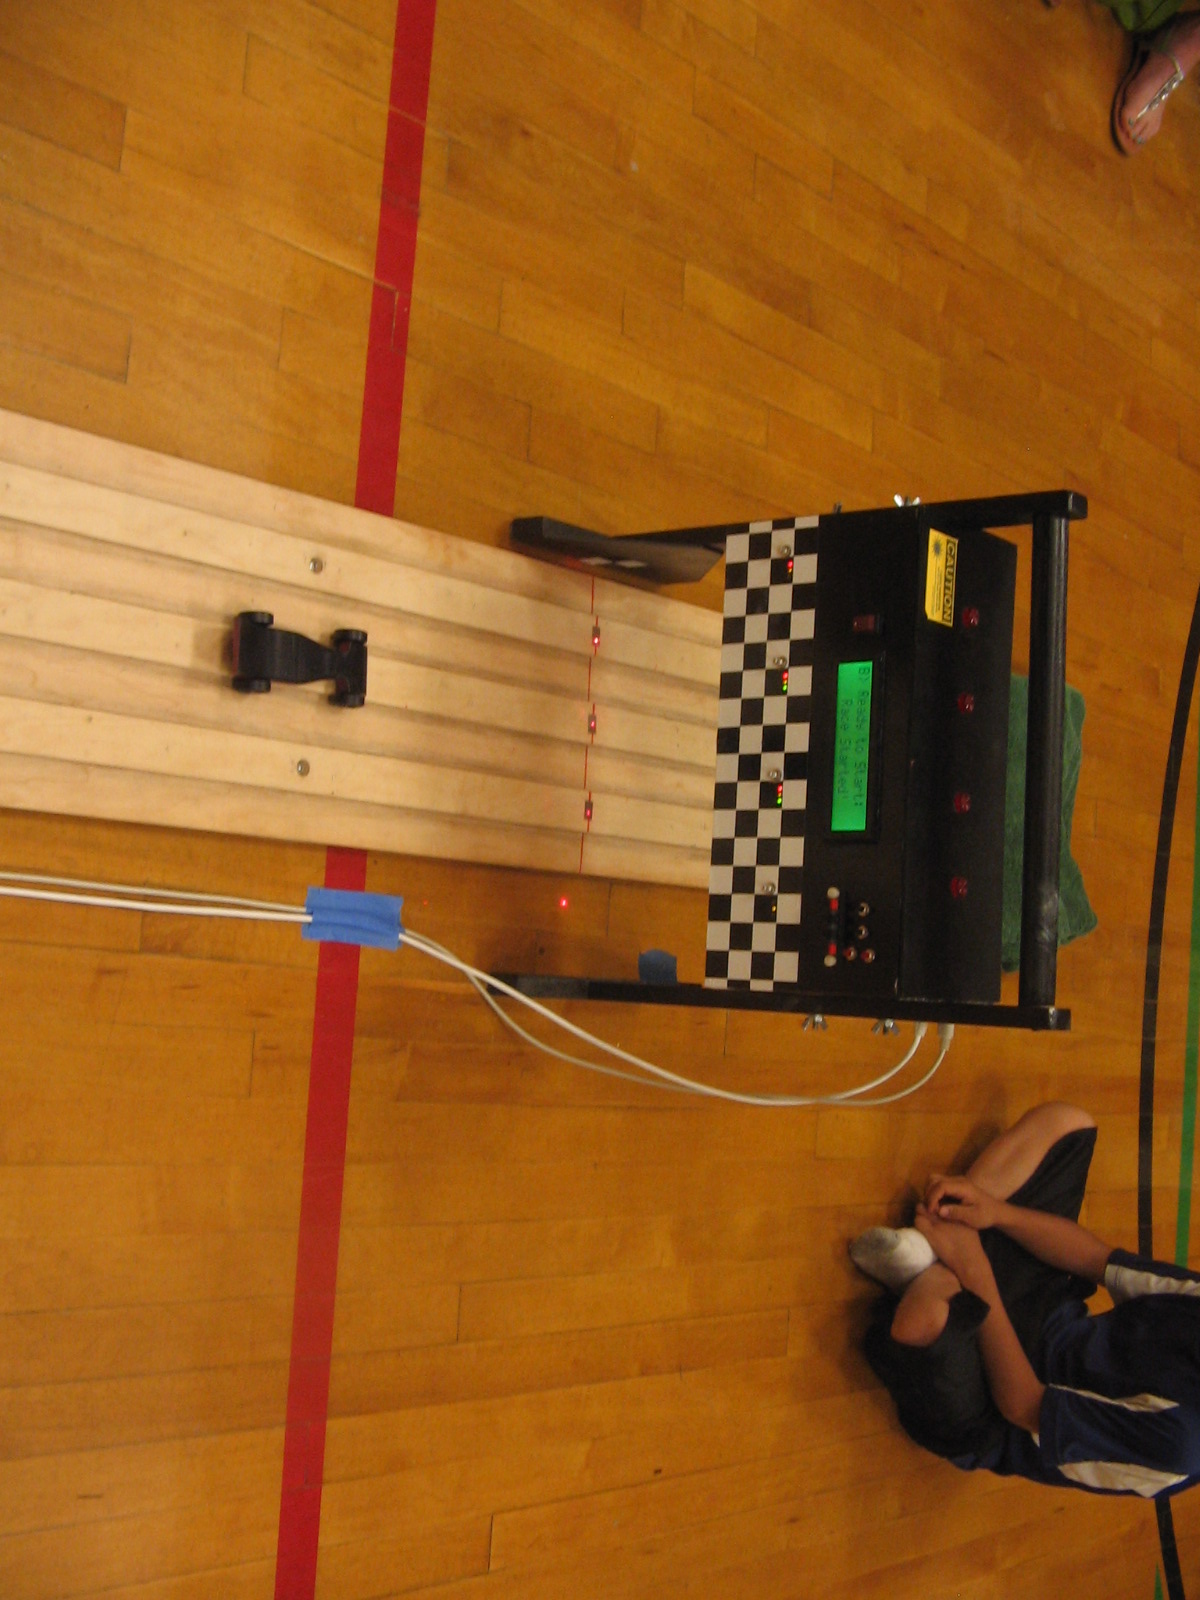
For illustration purposes, here is a picture of the ProtoStack next to the NerdKits.  The ProtoStack is the red circuit board on the left. There is an AVRISP mkII programmer (looks like a small mouse) plugged into it.  The NerdKits is on the right.  Note the green LCD display that comes with the NerdKits.

(Disclaimer:  This picture does not include all of the parts included with either kit.)

Finish Line Circuit

Image

This circuit detects cars crossing the finish line.  As cars interrupt the laser beam hitting the light detector, the voltage (Vmeasure) jumps in the circuit.  The voltage change is analog, but the microprocessor needs a digital signal to operate properly.  The LM339 converts the analog signal to a digital (ON/OFF) signal.  As soon as the voltage increases above the set point voltage, the LM339 switches (Vout) from digital ON (5 volts) to digital OFF (0 volts).

By adjusting a variable resistor, the circuit can be calibrated for the amount of light hitting the detector.  There are many variables that can impact the amount of light hitting the detector.  These include the brightness of the laser, how well the laser is aligned, how well the track reflects light, and the amount of ambient light.  Light intensity covers an extremely broad range.  So, it is important to have a flexible circuit.  When setting up for the race, the set point voltage (VTrip) is adjusted to be just below the measured voltage (Vmeasure).  This insures that the microprocessor will get the signal at the instant that the derby car crosses the finish line.

The finish line

The finish line has two components per lane: a laser beam and a photoresistor.  These components are mounted on a movable bracket underneath the derby timer to accommodate tracks with different lane spacings.  The laser is mounted on a flexible rod to allow the laser to be aimed precisely.

Laser beams are used in this design because the derby timer is portable and not permanently fixed to the track.  A portable design is convenient if you want to loan your timer out to your nephew’s cub scout pack.  The drawback to a portable design is that it must work without requiring modifications to the track, such as drilling holes in the track and installing lights and sensors.

Lasers shine onto the track from above and are reflected back up toward the sensors mounted underneath the derby timer.  Laser light is extremely bright and can be aimed precisely, so there is no need to use a high powered laser.  The derby timer uses Class-2 lasers like the ones found in handheld laser pointers.  Laser light can be very hazardous.  Take all necessary precautions to avoid looking at the laser beam, and do not use a more powerful laser, such as Class-3 laser.

Why measure to a millisecond?

The derby timer uses a microprocessor that can process millions of instructions per second.  Therefore making the derby timer measure in increments of less than a millisecond (0.001 second) is easily doable given the timer electronics.  So, why not go for 0.0001 of a second?

Consider a track that is 28 feet long, with a starting line that is 4 feet above the finish line.  A car that finishes the race in 2.8 seconds has an average speed of 10 feet/second, but is going about 16 feet/second at the end of the race.  In one millisecond, the car will cover 5 millimeters (1/4 inch).

The small laser beams used at the finish line are about 1 mm in diameter.  In order to measure to 0.0001 of a second accurately, the lasers would need to be aligned within 0.5 mm.  This could be done on the workshop bench, but would prove a little tricky (and unnecessary) in a gymnasium full of cubs scouts.

Of the 72 heat times recorded at my son’s pinewood derby, 30 head-to-head times were within 0.01 second on the same lane.  Only 2 of the 72 times were within 0.001 second on the same lane.  Measuring to 0.001 second makes the likelihood of a tie very remote, particularly in a race-off situation with only a few cars competing.

Conclusion: One millisecond is an ideal level of accuracy that is relatively easy to measure and does a good job of discriminating between close finishes.

Another thing to consider is that displaying 0.001 second requires one less character on the LCD display than 0.0001 second.  Display space is expensive.  You will want the largest display that fits your budget, so use the space wisely.

Pinewood Derby Timer

This blog is dedicated to building a digital timer for pinewood derby racing.  The pinewood derby is a cub scout activity that is held every year all across the United States.  Although I am a big fan of scouting, and my son is a cub scout, please do not interpret anything in this blog as an endorsement by the cub scouts or the boy scouts for what I have done.

I am not aware of any official scout rules that prescribe how a pinewood derby racing event shall be officiated.  Many race events are sucessfully held without any timing equipment.  I do not want to imply that having a timer is essential to running a successful derby activity.  It is not.  My main motivation for building the timer is the challenge, fun, and learning experience that it provided.  And besides, it is really cool on race day!

Here is a picture of the finished project in action:

Derby car speeds for the finish!


Introduction: Lessons Learned

The purpose of this blog is to share my lessons learned from a hobby project that I started last year.  The project was ultimately a success.  However, there was a whole lot of trial and error along the way.  I want to share what I have learned, so that others can have a head start if they are planning to do something similar.

I don’t really intend to create a step-by-step guide for this project.  If I were to create a step-by-step guide, the success of my blog would depend on how well a reader could replicate my project.  This project requires some skill with computers, electronics, and basic woodworking.  For a beginner, replicating this project would require a lot more details than I am willing to provide.  However, I do think that for someone who is already thinking of building a derby timer, the ideas here will help them get to their goal a lot faster.

Good luck, and much success.